
August 24, 2016: This week, Facebook announced a number of improvements to its Slideshow format ads. The tweaks include:
1. Tighter integration with Facebook’s stock image collection.
2. The ability to create Slideshow ads from Android devices.
3. Improved viewability on low-bandwidth connections.
Facebook slideshow ads provide a quick-and-easy way for businesses – especially SMBs who don’t have a library of high-quality video content – to create attractive, movie-like ads, complete with sound, in just a few minutes. The only thing that’s required is between 3 and 7 high-quality still images (Slideshow ads also can support video if that’s available), plus, of course, the will to navigate Facebook’s Ad Manager and make some straightforward production choices.
If you haven’t created any Slideshow ads yet, here’s a quick tutorial that will walk you through the process of creating one:
Creating your first Facebook Slideshow Ad
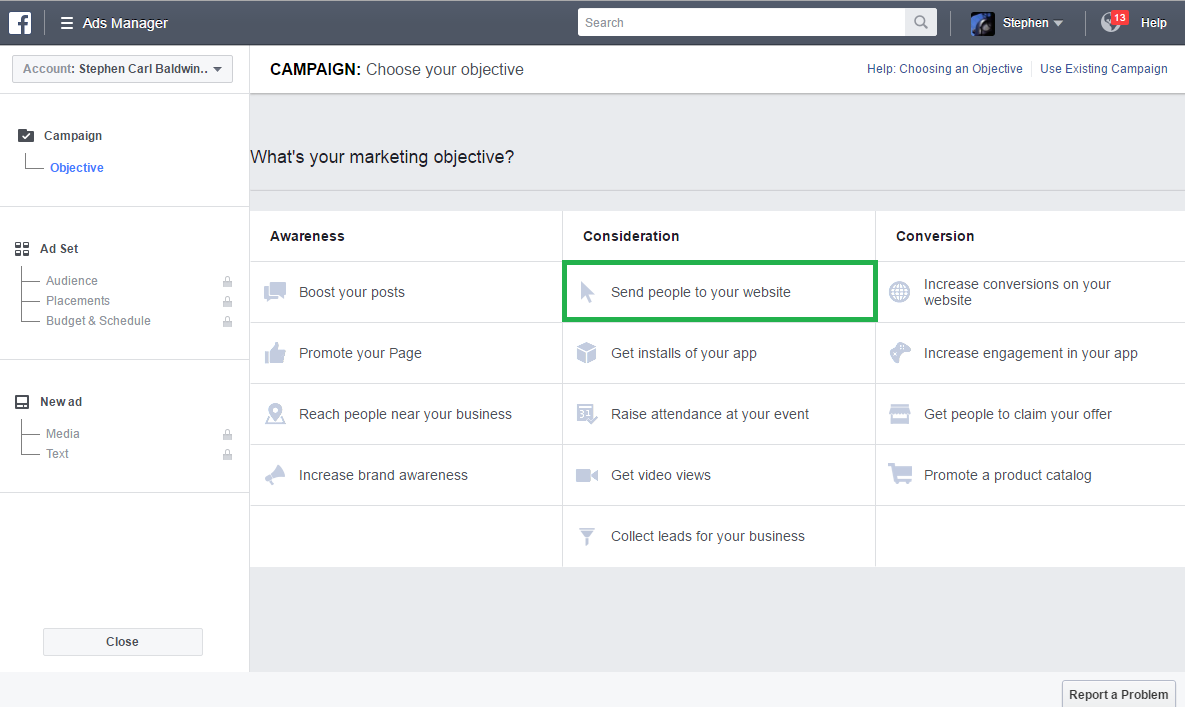
1.Go to Ads Manager and choose an Objective. Facebook lays out its selection of Objectives logically in columns corresponding to the Awareness/Consideration/Conversion phases of the customer buy funnel. In this case, I chose “Send people to your website.” Name your campaign and hit the “continue” button.
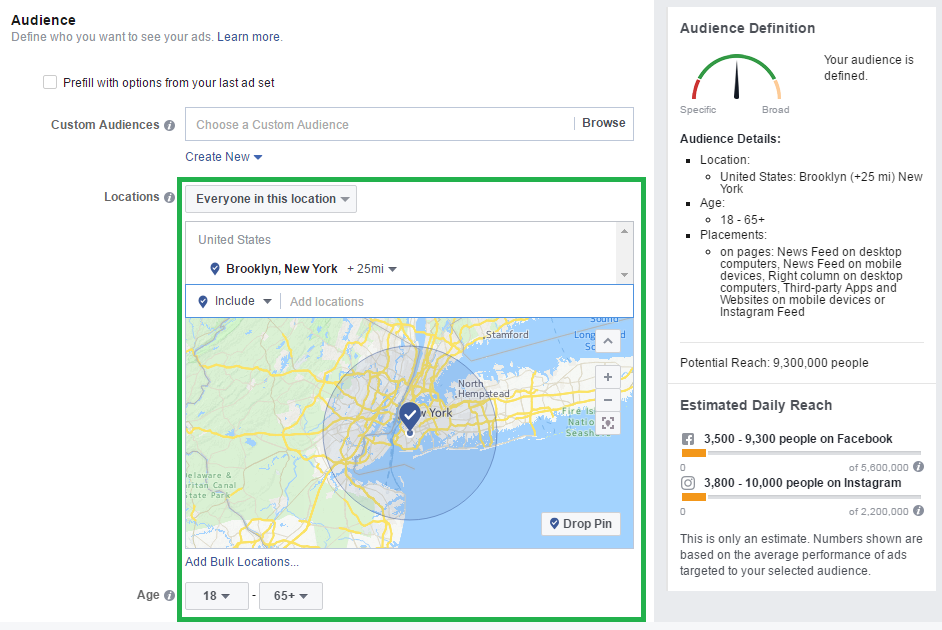
2. Select the audience you want to target. In this case, I chose simple geo-targeting (everyone in Brooklyn), but you have the option of selecting very precise targeting on this page, via demographics, behavior, custom audiences, and other segments. Keep an eye on the “Audience Definition” meter in the right-hand window; it will advise you of the approximate audience reach you’ll get with each selection.
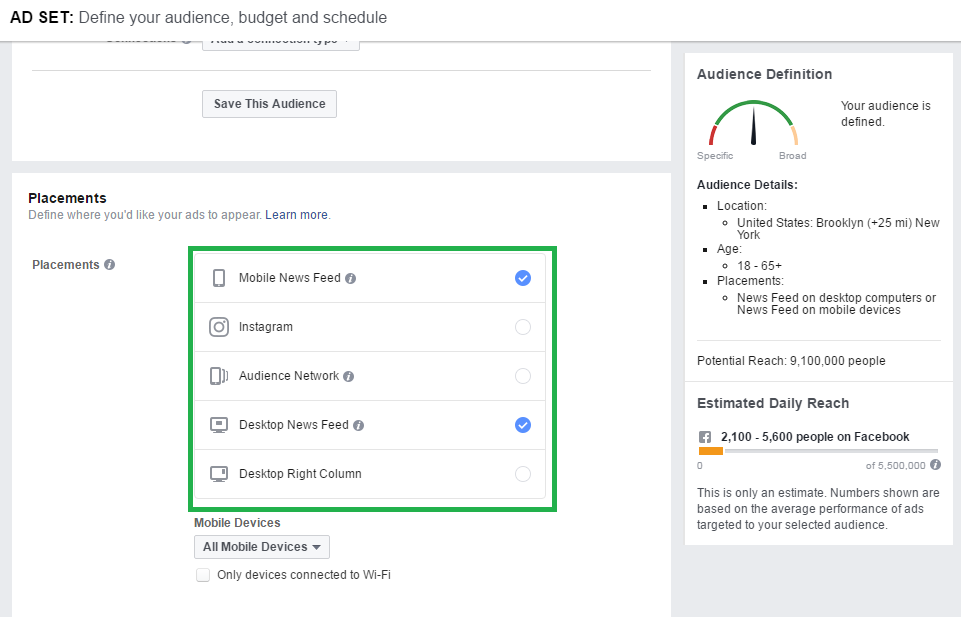
3. Select where you want the ads to run within Facebook’s family of services. In this case, I chose Desktop and Mobile News Feeds. Here you can also select whether you want your ads to appear in front of all mobile users, or just a single device type (for example, iPhones).
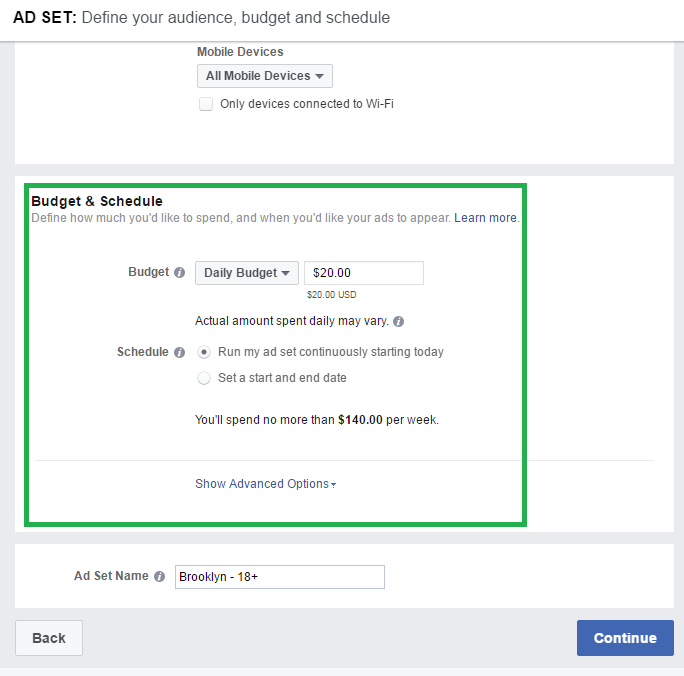
4. Select your budget, when you want your ads to run, and hit the “continue” button.
5. In the “create new ad” window, select “Slideshow.” A new window will open up. Click “Create Slideshow” (here’s where things get fun).
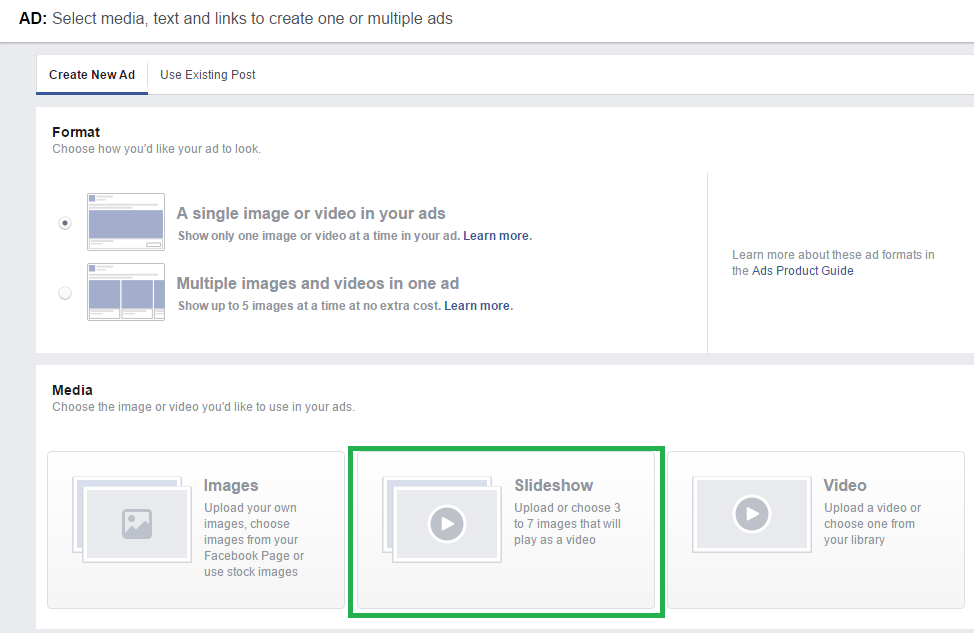
6. In this new window, you have full control over your Slideshow and can instantly see the effect of any changes you make. Note the “timeline”display in the lower part of this window. This is where your images will be put as you assemble them; you can easily re-sequence them here via drag and drop. Click Add Photos.
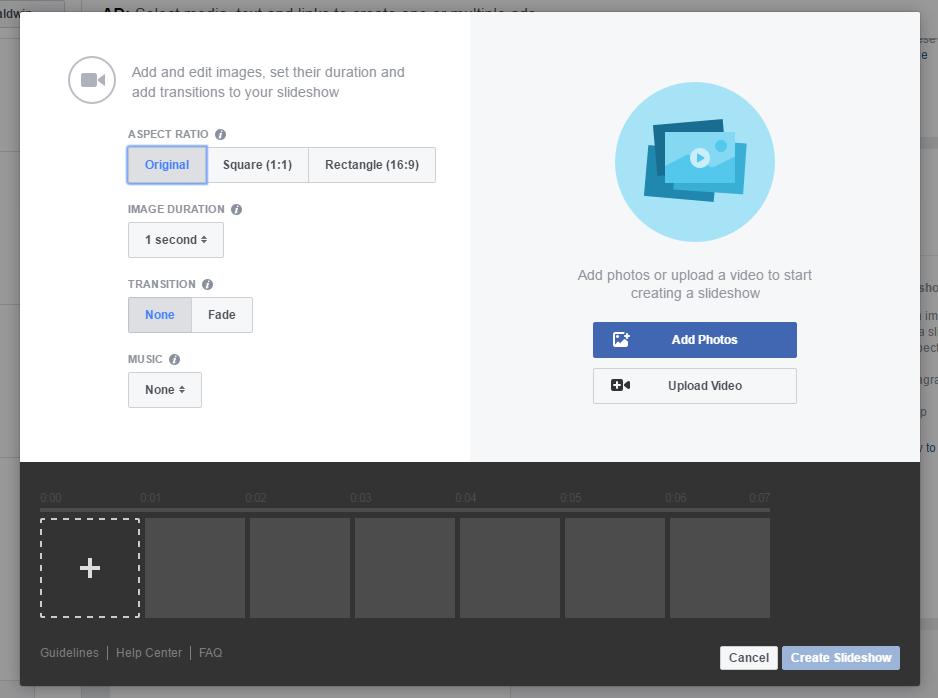
7. A new window will open that will let you choose images you’ve already uploaded to Facebook. Just click on them and they’ll be added to the “Create Slideshow” window. You also have the option of uploading images via this window.
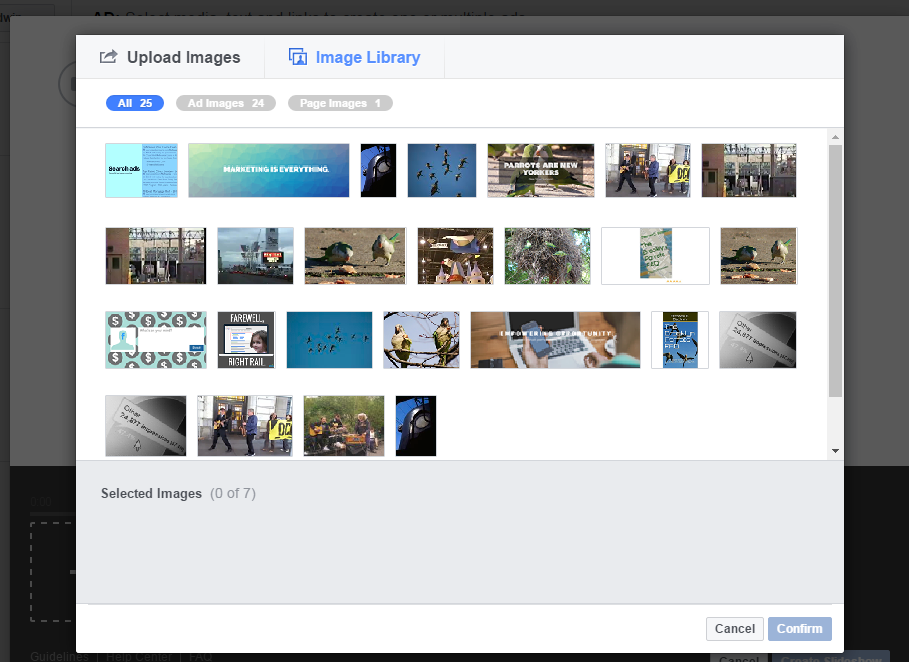
8. Now select the aspect ratio of your Slideshow. You can elect to have the first image in the timeline establish this ratio, or set it to 1:1 (square) or 16:9 (widescreen). Then set the duration that each photo stays on the screen, and a transition effect (Facebook only offers a fade at this point). Now select from one of Facebook’s canned music tracks.
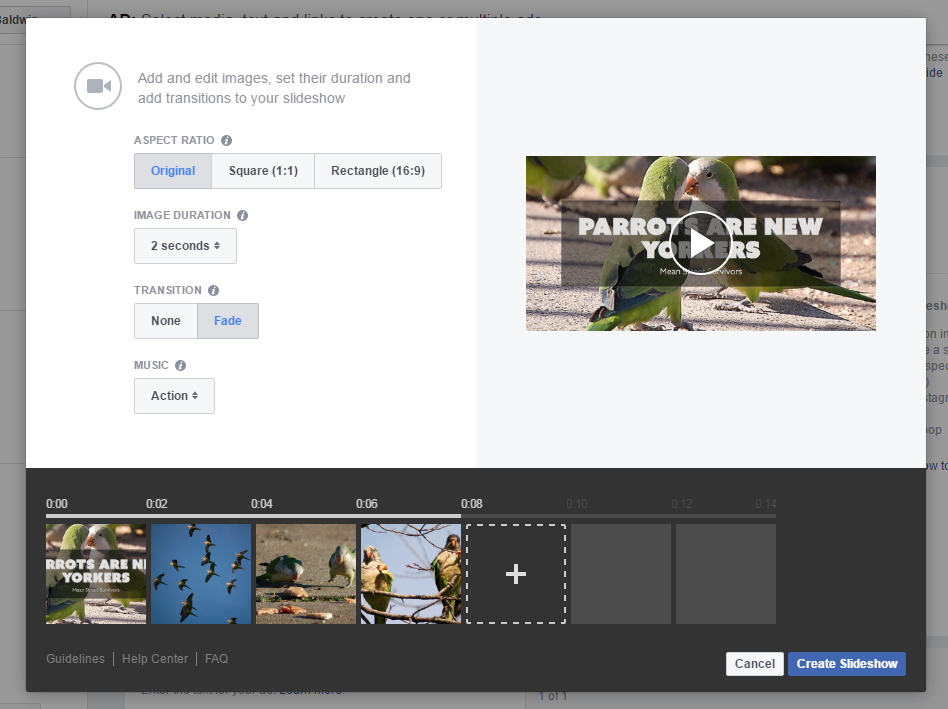
To see the impact of your changes, just click the “play” window, which is fully interactive, and when you’re happy, click “Create Slideshow.”
9. It will take Facebook a few minutes to compile your ad; when it’s ready you’ll see it in the “Media” section of the Ads Manager page. Here, you’ll be able to choose which of the images should serve as a static “thumbnail” image; you also have the option of selecting a completely different image if that works better.
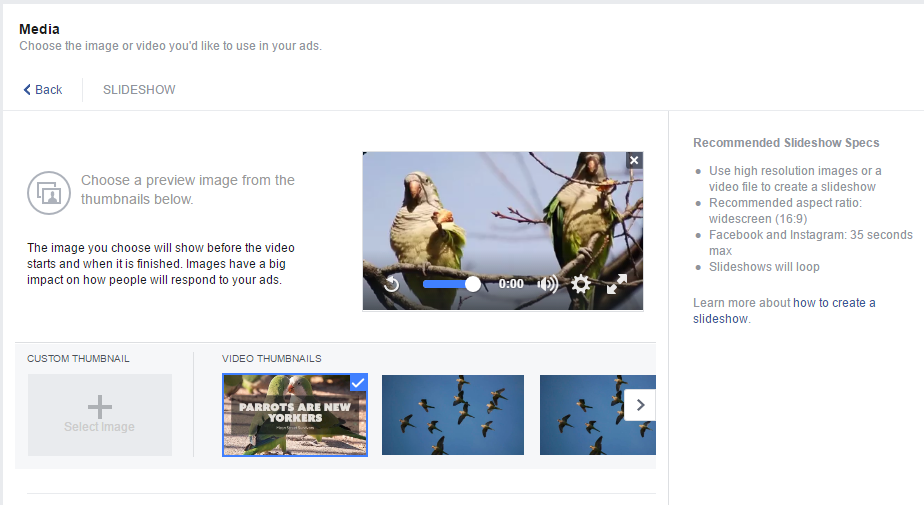
Now click “Place Order” and you’re done!
- 10 Mistakes to Avoid When Using QR Codes for Marketing - September 20, 2023
- Kevin Lee on How AI Changes the SEO Landscape - August 31, 2023
- The Power of Compound Marketing: Kevin Lee Presents @ 1MediaWorld 2023 Global Conference - March 7, 2023

